
Salt Lake Valley · Plumbing remodel hub
Plumbing remodel.
From underground
to finish.
We handle plumbing for kitchen, bathroom and basement remodels. Follow the job from underground drains through wall and floor rough-in to the finished fixtures, and see what each stage means for your room.

See the recorded project ↗
Long story short
We handle the plumbing for kitchen, bathroom and basement remodels, from moving drains and water lines to installing the finished fixtures. Bring us the layout you're planning. We'll work through the plumbing and coordinate the work with your contractor.
Jump to: The three stages of a plumbing remodel · Underground plumbing · Rough-in plumbing · Finish plumbing
Skip the read? Book a visit or text (385) 766-8935.
Start here / The work behind the room
The three stages of a plumbing remodel.
A plumbing remodel connects your new room to the water, drainage and gas systems already in the house. The work follows three stages.
- 01
Underground plumbing
The buried connections beneath the slab or in the ground.
Before backfill and concrete cover the new work.What this stage involves ↓ - 02
Rough-in plumbing
The pipes and concealed connections installed before walls and ceilings close.
While framing and plumbing routes are accessible.What this stage involves ↓ - 03
Finish plumbing
The fixtures, trim and final connections that make the room usable.
When the relevant surfaces and fixtures are ready for connection.What this stage involves ↓
Start with the fixture layout and existing pipe routes. These establish which connections stay, which move and where walls, floors or concrete need to open.
On schedules and inspection lists, buried work is also called “sub-rough” or “underground rough-in.”
What it means
Underground plumbing
Underground plumbing is piping installed in the ground. For a basement remodel, that usually means the drain branches beneath the concrete floor and their connection to the sewer route.
How it fits a plumbing remodel
Changes to buried fixture connections require access through the slab. The plumber locates the existing drain, checks its depth and condition, and lays out the new branches to match the room plan.
What the work can include
Locate the existing drain
Establish where the drain runs, how deep it is and where the new work will connect. Identify the purpose of each capped pipe using available plans, inspection and locating work.
Lay out the fixture connections
Mark the toilet connection, shower trap and drain branches from the selected fixtures. A branch joins a fixture to the shared drain. A trap holds water to block sewer gases.
Open the slab and install the pipes
Cut and remove the planned section of concrete, excavate and bed the new pipe so it is supported along its route. Position the fittings for later fixture connections, then test and inspect before backfilling and restoring the slab.
Connect the drainage and venting
Give the drains a continuous downhill route to the sewer connection. Plan vent connections and accessible drain-cleaning openings. Where the sewer connection is too high for gravity drainage, plan the sewage-pump system.
Before the trench is covered
- The actual fixture layout matches the new connections.
- The required pipe tests and under-floor inspection are complete, with any corrections resolved.
- Pipe locations are photographed and measured. The schedule identifies who will backfill the trench and restore the concrete.
A project that changes buried water or gas service also needs a planned route and suitable pipe and fittings for that service.
Reference: ICC · Liberty Pumps · Springville · Greater Salt Lake MSD
What it means
Rough-in plumbing
Rough-in plumbing installs the water pipes, drains, vents and concealed valves inside the walls and floors. The connections are positioned while the framing is open, ready for the room’s fixtures.
How it fits a plumbing remodel
The plumber opens the agreed areas, connects the new routes to the existing system and sets the fixture connection points. The layout coordinates pipe space, framing, cabinets and the thickness of the finished surfaces.
What the work can include
Position the connections
Use the actual sink, cabinet, toilet, tub and shower specifications. A stub-out is a pipe end left ready for a later connection. Locate it with room for wall finishes, flooring, drawers and the fixture itself.
Install water, drain and vent lines
Run the water supplies and install the drains, vents and concealed shower valve. DWV means drain, waste and vent: pipes that carry used water away and provide air paths to protect the water held in traps.
Support and protect the pipes
Route pipes around beams and through permitted openings in the floor joists. Supports hold the pipes in position, and protective plates shield vulnerable spots from screws and nails used during finish work.
Check the equipment connections
Include gas piping, appliance connections and changes to hot-water demand in the plan. Check the selected equipment against the capacity of the shared systems that supply it.
Before the walls and ceilings close
- Fixture positions, valve depth and service access agree with the final room layout.
- The specified tests and required rough inspections are complete, with corrections resolved.
- The next trades know where the pipes are and which valves, cleanouts or devices must remain reachable.
Tubs and shower bases are installed at the stage specified by their manufacturer. Their drains, wall systems and waterproofing need a coordinated sequence, including any required shower-pan test.
Reference: ICC · ICC · ICC · Weyerhaeuser · Moen · ICC · KOHLER · Greater Salt Lake MSD
What it means
Finish plumbing
Finish plumbing installs and connects faucets, toilets, sink drains, traps, shower trim and the planned appliance hookups. It is also called trim-out. Shower trim is the visible handle, cover plate and outlets fitted to the valve in the wall.
How it fits a plumbing remodel
The plumber connects the new fixtures to the prepared rough-in, fits the matching trim and checks operation. Cabinets, counters and the relevant wall and floor finishes must be ready for those connections.
What the work can include
Set and connect the selected fixtures
Fit toilets and faucets, connect sink drains and traps, and complete the specified shutoffs, supply lines and appliance hookups. Finish the sink connections after the sink and countertop are securely installed.
Fit the matching shower trim
Fit the handle, cover plate and outlets that match the installed valve. Complete the operating adjustments in the manufacturer’s instructions.
Run water and check operation
Check the new connections for leaks. Confirm that fixtures fill, drain and shut off correctly, and verify hot and cold operation and equipment settings.
Hand over a serviceable room
Complete the required final inspection. Show the owner the shutoff locations and service access, and hand over fixture information and records of the concealed work.
Before the finish visit
- The relevant cabinet, counter, flooring and wall finishes are ready and the fixtures are on site.
- Faucet, drain and shower trim models match the planned connections and concealed equipment.
- Have the sink mounted and ready for its plumbing connections. A countertop or sink specialist handles undermount mounting, and we connect the water and drain.
The handoff schedule should identify who completes waterproofing, tile, paint and cabinet work, then makes the room available for the final plumbing connections and required inspections.
Reference: KOHLER · Moen · ICC · Springville · Greater Salt Lake MSD
See the stages in the house
Follow every system.
Understand the connections.
Choose a floor or plumbing system, then select a part to inspect its connections. Follow its route through the house and see what to account for when remodeling around it.
Loading the house. All part explanations are also available below.
Drag to rotate · Select a floor or named part · Expand for a bigger view
A drain carries water. A vent gives air a path.
Follow a fixture’s air connection to the roof. The dark drains stay visible so the vent has context.
Understand the trap, drain and vent together
Start at the water seal
The curved trap holds water that blocks sewer air from entering the room. A toilet’s trap is built into its porcelain body.
Find the vented connection
The trap arm is the drain section between the trap and its vented connection. Its length and slope affect how the trap is protected. Here, sink trap arms join vertical sanitary tees; toilet branches have vent connections that rise toward the roof.
Reference: ICC · Charlotte Pipe
Follow the air route upward
A dry vent gives air a path into and out of the drain system. In this model, the vents rise above the fixture flood rims, the edges where water could spill over, before joining the route to the roof.
Reference: ICC
How wet venting works
A wet vent serves drainage and venting together in an approved pipe arrangement. Its design accounts for the fixtures served, their connections and pipe sizing. The model uses separate dry vents to make the air routes easy to follow.
Reference: ICC
Whole building
One house. Connected systems.
Pressure brings clean water to fixtures. Gravity carries used water to the sewer. Plumbing vents let air move through the drain system. Gas has its own pipes and controls.
What it changes in a remodel
Trace each new connection back to the shared supply, drain or gas line. That route establishes the access needed through the house.
Look in the house: Choose a floor, follow a coloured service, then select a fixture. The front walls and part of the floors are cut away so you can see the connections.
Plan the rough-in sequence →Basement
Main water shutoff
The main shutoff closes the water supply to the house. Smaller valves at sinks and toilets close the supply to those fixtures.
What it changes in a remodel
Keep the main valve reachable in the finished room. Schedule water shutoffs with the household before work starts.
Look in the house: The blue pipe enters below ground, reaches the main valve, then branches through the house.
Water shutoffs and access →Reference: ICC
Across floors
Cold-water distribution
One supply branches to the kitchen, laundry and bathrooms. It also feeds the water heater. A toilet needs cold water only.
What it changes in a remodel
Check water delivery for the fixtures expected to run together. Their combined demand determines what the shared supply must provide.
Look in the house: Follow the blue vertical pipe upward, then out along the branches to each fixture and its shutoff.
Water pressure and supply checks →Reference: ICC
Across floors
Hot-water distribution
The orange-red route starts at the water heater and reaches the outlets that need hot water.
What it changes in a remodel
Hot water must travel from the heater to the tap. Longer pipe routes hold more water to clear before the hot water arrives, so route length matters when relocating fixtures.
Look in the house: Follow the orange-red pipes from the heater to the faucets and shower valve, where hot and cold water mix.
Check hot-water demand →Reference: ICC
Basement
Storage water heater
The tank stores heated water for the household. Cold water enters the tank, a gas burner heats it, and the hot outlet supplies the fixtures.
What it changes in a remodel
An added bathroom or larger shower can change hot-water demand. Keep room to operate, service and eventually replace the heater.
Look in the house: Follow cold water into the tank, hot water out, the separate gas connection and the exhaust above. Two restraint bands secure the tank to backing. Its relief discharge ends openly above the nearby floor drain.
Water heater repair and learning hub →Reference: ICC · Utah Legislature
Basement
Water heater inlet shutoff
This valve closes the cold-water supply entering the heater.
What it changes in a remodel
Finishing the room should leave the valve and heater service area accessible.
Look in the house: Find the valve on the blue pipe just before it enters the tank.
Planning a water heater installation →Reference: ICC
Basement to roof
Combustion exhaust
Burning gas creates combustion products. This metal route carries them from the example water heater toward outdoors.
What it changes in a remodel
A remodel must account for combustion air and the appliance’s exhaust route as well as its water and gas connections.
Look in the house: Follow the grey metal flue from the heater to its outdoor outlet. Combustion exhaust requires a dedicated, approved route.
Water heater installation checks →Reference: ICC
Across floors
Shared drain stack
A stack is a vertical drain that receives wastewater from more than one level.
What it changes in a remodel
A new drain connection needs space through the floor, adequate capacity in the stack and a planned vent connection.
Look in the house: Dark drain branches enter the stack; it turns below the basement and heads toward the sewer.
Sewer and underground plumbing →Reference: ICC
Across floors and roof
Dry plumbing vents
Vents let air move through the drain system, helping protect the water seal in each trap.
What it changes in a remodel
Plan the vent connection when locating a fixture’s drain. The route needs space through the walls and a connection to the vent system.
Look in the house: Select Plumbing vents to follow the teal air routes upward from the fixtures to the roof outlet.
Bathroom drains and fixture explanations →Reference: ICC
Below the basement
Below-slab drainage
Buried branches join a building drain, which carries wastewater out toward the sewer.
What it changes in a remodel
Locate and measure the existing drain before planning slab access. Its route and depth set the available connection points.
Look in the house: Choose Below slab. Five branches join one sloping main through wyes—Y-shaped fittings pointed toward the sewer. The stack, basement fixtures and floor drain all connect to this main.
Basement planning chapter →Reference: ICC · Charlotte Pipe · Liberty Pumps
Basement
Drain cleanout
A cleanout is a capped opening where a plumber accesses the inside of a drain for cleaning or inspection.
What it changes in a remodel
Include a reachable access opening in the finished wall, floor or cabinet around each cleanout.
Look in the house: There is a capped stack cleanout and a floor-level cleanout at the upstream end of the building drain. Both must stay accessible after finishing.
Drain service and diagnosis →Reference: ICC
Basement
Basement sink
The faucet gets hot and cold water. Used water passes through a P-trap, then a vented drain connection.
What it changes in a remodel
The sink bowl, cabinet drawers and countertop set how much room remains for the trap and supplies.
Look in the house: The cabinet is open here so you can see the stops and the U-shaped water-holding part of the trap.
Sink and faucet plumbing →Upstairs
Bathroom sink
The faucet gets hot and cold water. Used water passes through a P-trap, then a vented drain connection.
What it changes in a remodel
The sink bowl, cabinet drawers and countertop set how much room remains for the trap and supplies.
Look in the house: The cabinet is open here so you can see the stops and the U-shaped water-holding part of the trap.
Sink and faucet plumbing →Basement
Basement toilet
A toilet has a trap built into its porcelain body. It connects through a floor flange to its drain and gets one cold-water supply.
What it changes in a remodel
Select the toilet before setting the rough-in. Measure against the finished wall and coordinate the flange with the finished floor.
Look in the house: Use Below slab to follow the toilet’s drain branch from its floor connection to the shared building drain.
Toilet connections and repair →Reference: KOHLER
Upstairs
Upstairs toilet
A toilet has a trap built into its porcelain body. It connects through a floor flange to its drain and gets one cold-water supply.
What it changes in a remodel
Select the toilet before setting the rough-in. Measure against the finished wall and coordinate the flange with the finished floor.
Look in the house: Follow the connection below the toilet through the floor to its branch drain and the shared stack.
Toilet connections and repair →Reference: KOHLER
Upstairs
Shower and concealed valve
A shower has hot and cold inlets, a mixing valve, an outlet to the head, and a separate trapped drain.
What it changes in a remodel
Tile and backer thickness affect valve depth. The drain must suit the shower base and waterproofing assembly. Resolve those choices before closing the wall.
Look in the house: The valve and its hot and cold inlets are behind the tiled wall. Turn House shell off to expose them. The head and trim mount to that wall; the shower drain has one P-trap below the receptor.
Shower and tub plumbing →Main floor
Kitchen sink and dishwasher
The sink has two water supplies and a trapped drain. A dishwasher also needs an appropriate supply and drain connection.
What it changes in a remodel
An island sink needs water, a drain and a vent route through the floor. Coordinate those connections with the cabinet layout.
Look in the house: The open cabinet shows the trap and water shutoffs. Check the selected dishwasher’s installation instructions for its drain connection.
Kitchen remodel planning →Basement
Laundry standpipe
The washer hose empties into an open standpipe: a vertical receptor with a trap and vented drain connection.
What it changes in a remodel
A laundry move changes supply, drainage and access. A gas dryer also adds fuel and dryer-exhaust requirements.
Look in the house: Follow the washer hose to the open top of the standpipe, then follow the pipe down through its trap.
Appliance and laundry plumbing →Outside at main-floor grade
Outside gas meter and service valve
The meter measures gas delivered to the property. The adjacent regulator and service valve are part of the supply arrangement.
What it changes in a remodel
Additional gas equipment can affect shared piping and meter capacity. The utility and plumber have different responsibilities.
Look in the house: Find the meter outside at main-floor grade, with its display facing away from the house.
Utility and homeowner responsibilities →Reference: ICC
Outside to appliances
Gas distribution
A dedicated gas route enters the house and branches to the example water heater and range.
What it changes in a remodel
Adding or moving gas equipment requires a capacity check using appliance demand, supply pressure and the full pipe route.
Look in the house: Follow the gold pipe from the outside meter to the range and water heater.
The whole gas-line learning hub →Reference: ICC
Basement
Appliance gas shutoff and sediment trap
The shutoff isolates this appliance. The capped pocket below the gas tee is a sediment trap, sometimes casually called a drip leg.
What it changes in a remodel
Leave room to reach the appliance’s shutoff after cabinets and finishes are installed. A sediment trap collects debris before it can enter the appliance’s gas controls.
Look in the house: Find the water-heater shutoff, then the capped sediment pocket below the tee downstream of it.
Appliance gas connections →Reference: ICC
Main floor
Gas range
This example range has its own accessible gas shutoff and appliance connection.
What it changes in a remodel
Cabinets and a moved range can change access and the gas route. Appliance clearances and ventilation also belong in the plan.
Look in the house: Follow the branch from the shared gas line to the range shutoff and appliance connection.
Gas pressure and capacity →Reference: ICC
Whole building
Framing and service chases
A chase is a space reserved for pipes. Planning that space alongside the wall studs and floor joists gives the pipes a continuous route through the house.
What it changes in a remodel
Plan pipe openings before cutting the framing. Engineered joists have manufacturer limits for hole sizes and locations, and larger structural changes may need an engineer’s detail.
Look in the house: The exposed studs, joists and floor edges show where pipe routes share space with the building structure.
The order of rough-in work →Reference: Weyerhaeuser
Basement and below slab
Mechanical-room floor drain
The grate leads into a water-filled P-trap and a vented drain branch. The open end of the heater’s temperature-and-pressure relief pipe sits above the grate, with air between the two.
What it changes in a remodel
Keep the drain reachable when finishing the mechanical room. An infrequently used trap can dry out, so its seal needs protection. The illustrated drain includes a barrier device above its P-trap.
Look in the house: Choose Below slab to follow the floor drain’s trapped branch to the shared drain and sewer outlet.
Water-heater connections and protection →Reference: ICC · RectorSeal · Utah Legislature
Roof
Open roof vent
This open pipe connects the drainage system to outdoor air.
What it changes in a remodel
Changes to the vent route require suitable pipe sizing, roof placement and flashing to seal the opening against weather.
Look in the house: The dry vent connections meet inside the upper wall. The open terminal alone passes through the roof; the dark boot seals around the pipe.
How the drain and vent work together →How to read this teaching house
Plan plumbing changes in an existing Salt Lake Valley home. Explore the pipes beneath the slab, inside the walls and at the finished fixtures, then see how each stage fits into a remodel. The roof, front walls and sections of floor are cut away to expose the pipe routes. The colours identify each service. Floor views show a selected portion of the connected system.
Part buttons give keyboard users the same explanations as clicking the model. On a phone, use the floor buttons and Expand house to inspect the details.
Plan the plumbing for your room
What are you
changing?
Pick the project to focus your preparation list. These are the questions to resolve together before anyone closes a wall.
Bathroom remodel
Choose the toilet, shower valve, tub or shower base, sink and cabinet early. Their dimensions establish the drain locations, water connections and valve depth.
Start with the fixture specifications and a measured layout. Check the drain and vent routes, framing space and access before committing to new positions.
Start with these three questions
- Which exact fixture models and trim have you chosen?
- Will the toilet, shower drain or wall valve move?
- What is the finished wall and floor thickness?
How the stages apply to this project
- Underground plumbing ↗
- Changes to drains beneath a concrete slab require locating the existing branches and planning the new buried connections.
- Rough-in plumbing ↗
- Move or adapt the drains, vents, supplies and concealed valve to the selected fixtures and final wall thickness.
- Finish plumbing ↗
- Connect the toilet, faucet, sink drain and matching shower trim after the relevant finishes are ready.
Kitchen or laundry move
Fit the plumbing around the actual sink, cabinets and appliances. Leave space for the drain and water connections, with access to shutoff valves and parts that need servicing.
Confirm the drain and vent route before fixing the sink or laundry location. Coordinate the pipes with cabinet drawers, appliances and the available space through the floor.
Start with these three questions
- Is the sink staying on a wall or moving into an island?
- Which sink, dishwasher, disposal and range are going in?
- Do drawer boxes or pull-out bins occupy the plumbing space?
How the stages apply to this project
- Underground plumbing ↗
- For a relocated sink or laundry over a slab, establish whether the drain route requires changes to buried piping.
- Rough-in plumbing ↗
- Plan sink and laundry drainage and venting, water lines, and any changed gas appliance connection around the actual cabinet and equipment.
- Finish plumbing ↗
- Connect faucets, traps and the agreed appliance hookups after the cabinets, counter and securely mounted sink are ready.
Basement bathroom
Identify the existing under-slab drains and measure their positions against the proposed room. Check their connections, condition and depth before setting the fixture layout.
Measure the available drop from the fixtures to the sewer connection. That establishes whether the planned drains can run by gravity or need a sewage-pump system.
Start with these three questions
- Are there plans or photos from the original under-slab work?
- Where and how deep is the existing drain connection?
- Are the fixture locations staying over the stubs?
How the stages apply to this project
- Underground plumbing ↗
- Identify and verify the existing stubs, or plan new buried branches and the route to the sewer. Decide whether gravity drainage is possible.
- Rough-in plumbing ↗
- Build the room’s water and vent connections and concealed valves, with access to equipment and service points after the room closes.
- Finish plumbing ↗
- Fit and connect the fixtures, verify operation and complete the required final checks before putting the bathroom into use.
Select the actual fixtures
Model numbers, cabinet drawings and finish thicknesses turn a sketch into connection locations.
Bring: Fixture model numbers; sink and cabinet dimensions; valve and trim selections.
Find the drain and vent route
The route has to work through the real house, including the connection to the plumbing that stays.
Bring: Existing and proposed fixture locations; photos of accessible pipes; which rooms are below.
Coordinate framing
Joists, beams and load-bearing walls set limits on the space available for pipes.
Bring: Framing type if known; plans for walls or openings that change.
What the plumber needs to establish
Mark pipe openings using the limits for the actual framing. Get a design for any change beyond those limits before the structure is cut.
Reference: Weyerhaeuser
Check shared water and hot-water demand
Another bathroom adds demand to the lines and heater serving the rest of the home.
Bring: Which outlets may run together; known flow concerns; the heater model.
What the plumber needs to establish
Assess supply conditions and the combined demand of the planned fixtures, including hot-water use.
Reference: ICC
Include gas equipment in the plan
Changing a range or adding equipment may change the required gas delivery and connection.
Bring: Fuel type, appliance models and planned locations.
What the plumber needs to establish
Review the gas route, load, shutoff access and manufacturer requirements.
Reference: ICC
Identify the existing under-slab work
Pipe location, depth and condition determine which buried connections suit the new layout.
Bring: Plans, photos, accessible cleanouts and original rough-in records.
What the plumber needs to establish
Verify what the pipes serve and whether they suit the proposed layout.
Reference: ICC
Establish gravity drainage first
Available elevation decides whether waste can run downhill to the connection.
Bring: Any known sewer depth or existing sewage system information.
What the plumber needs to establish
If gravity is not feasible, plan the appropriate pumping, venting, power and access together.
Reference: Liberty Pumps
Keep service points reachable
A finished room still needs access for valves, cleanouts and equipment service.
Bring: Cabinet and wall finish plans, including proposed access panels.
Agree on the cover-up and finish sequence
The person closing the wall needs to know when the plumbing is ready to be covered.
Bring: Project address, permit contact and the trades involved.
What the plumber needs to establish
Schedule tests and inspections while the pipes are exposed. Assign wall and floor repairs, and photograph the work before it is covered.
Reference: Salt Lake City · Springville
Use the checkmarks to track information ready for your plumbing visit. They reset when you reload this page.
Bathroom remodel.
Plan the connections.
Start with the fixture specifications and a measured layout. Check the drain and vent routes, framing space and access before committing to new positions.
Measure from the finished surfaces
The finished wall and floor determine where the connections belong. Include tile, backer and flooring thickness when setting the shower valve depth and locating the toilet connection.
Plan the drain through the floor
Locate the connection to the existing drain and plan the slope and vent route. Coordinate openings with the floor framing. Include access and ceiling restoration below the bathroom when that route needs to be opened.
Reference: ICC · Weyerhaeuser
Check shower demand
Use the selected shower outlets and their expected simultaneous use to check water delivery and hot-water capacity. WaterSense-labelled fixtures meet water-efficiency and performance criteria, making the label useful when comparing fixture options.
Reference: ICC · EPA WaterSense
Kitchen or laundry move.
Plan the connections.
Confirm the drain and vent route before fixing the sink or laundry location. Coordinate the pipes with cabinet drawers, appliances and the available space through the floor.
Build around the actual cabinet
Review the sink dimensions and cabinet drawing together. Allow space for the disposal, bins, drawers and water treatment equipment, then locate the supplies and drain. Keep the shutoff valves reachable and room to disconnect the trap.
Reference: ICC
Plan an island sink’s vent
An island sink needs a vent connection to protect the water held in its drain trap. Choose an approved vent arrangement for the project and plan its route and service access while the floor and cabinet spaces are open.
Reference: ICC
Count the appliances, too
List the dishwasher, refrigerator, disposal, washer and range models. Assign their water, drainage, electrical and gas connections to the relevant trades. Include appliance access and finish restoration in the estimate.
Reference: Salt Lake City · ICC
Basement bathroom.
Plan the connections.
Measure the available drop from the fixtures to the sewer connection. That establishes whether the planned drains can run by gravity or need a sewage-pump system.
Match the existing connections to the layout
Identify each capped pipe and check its position against the selected fixture and finished wall. Verify the shower trap and vent route. Record which connections are suitable to reuse and which need to move.
Plan drainage around the sewer depth
A suitable sewage-pump system lifts wastewater to a sewer connection that is too high for gravity drainage. Include the covered, vented basin, discharge pipe, controls, power and maintenance access in the room plan. Select equipment rated for the waste it will handle.
Reference: Liberty Pumps
Coordinate access and concrete restoration
Plan who will locate pipes, cut and remove concrete, excavate, install the drains and restore the slab. Test and inspect the exposed piping, then photograph and measure its location before covering it.
Reference: Springville · Salt Lake City
Try the geometry
A longer drain needs more fall.
Fall is the vertical drop from one end of a sloping pipe to the other. This example uses a chosen slope of ¼ inch per foot.
This example uses a slope of ¼ inch per foot. Every added foot of drain needs another ¼ inch of fall, plus space for the fittings and trap. The pipe size and connection depth determine the workable route and its required slope.
Reference: ICC
12 ft × ¼ in/ft = 3 inches
The route must fit between the fixture and the actual sewer connection.
From plan to working room
The remodel sequence.
Who needs to be ready next?
Coordinate plumbing visits with demolition, inspections and the trades finishing the room. Agree on who prepares each work area and what must be complete before the next trade starts.
- 01
Plan the remodel and open the right areas
Choose fixtures, establish what stays, locate the existing services and agree on access, permits and the work assigned to each trade. Plan temporary loss of water or use of the room.
Reference: Salt Lake City · Salt Lake City
- 02
Underground work, when the layout needs it
Install or change the buried connections. Complete the required checks while the work is exposed, then coordinate backfill and concrete restoration.
Reference: Springville · Greater Salt Lake MSD
- 03
Rough-in the concealed plumbing
Install the above-ground pipes and concealed equipment. Coordinate the framing, shower or tub system, tests and rough inspections before covering the relevant work.
Reference: Greater Salt Lake MSD · Weyerhaeuser · KOHLER
- 04
The other trades build the finished room
Complete the planned wall systems, waterproofing, cabinets, counters and flooring in the order required by the selected products. Protect the new plumbing and keep service access open.
Reference: KOHLER · Springville
- 05
Finish the plumbing and check the room
Connect the remaining fixtures and appliances, check operation and leaks, complete required final inspections and hand over the project records.
Reference: KOHLER · Springville
Compare the actual work
A useful estimate
answers these.
A clear estimate covers connections, access, materials, testing and restoration. It also explains how changes will be documented and approved when concealed pipes are exposed.
- Does the price assume the current layout or include moving connections?
- Who opens and repairs drywall, tile, cabinets and concrete?
- Which fixtures, valves and connection materials are included?
- Who handles permits, inspections and coordination with other trades?
- How are hidden conditions documented and changes approved?
- Which tests, finish connections and closeout records are included?
We handle the plumbing portion of the remodel. Name the trades responsible for demolition, structural changes, electrical work, waterproofing, cabinets and finish repairs in the project plan.
Recent and Related Plumbing Work
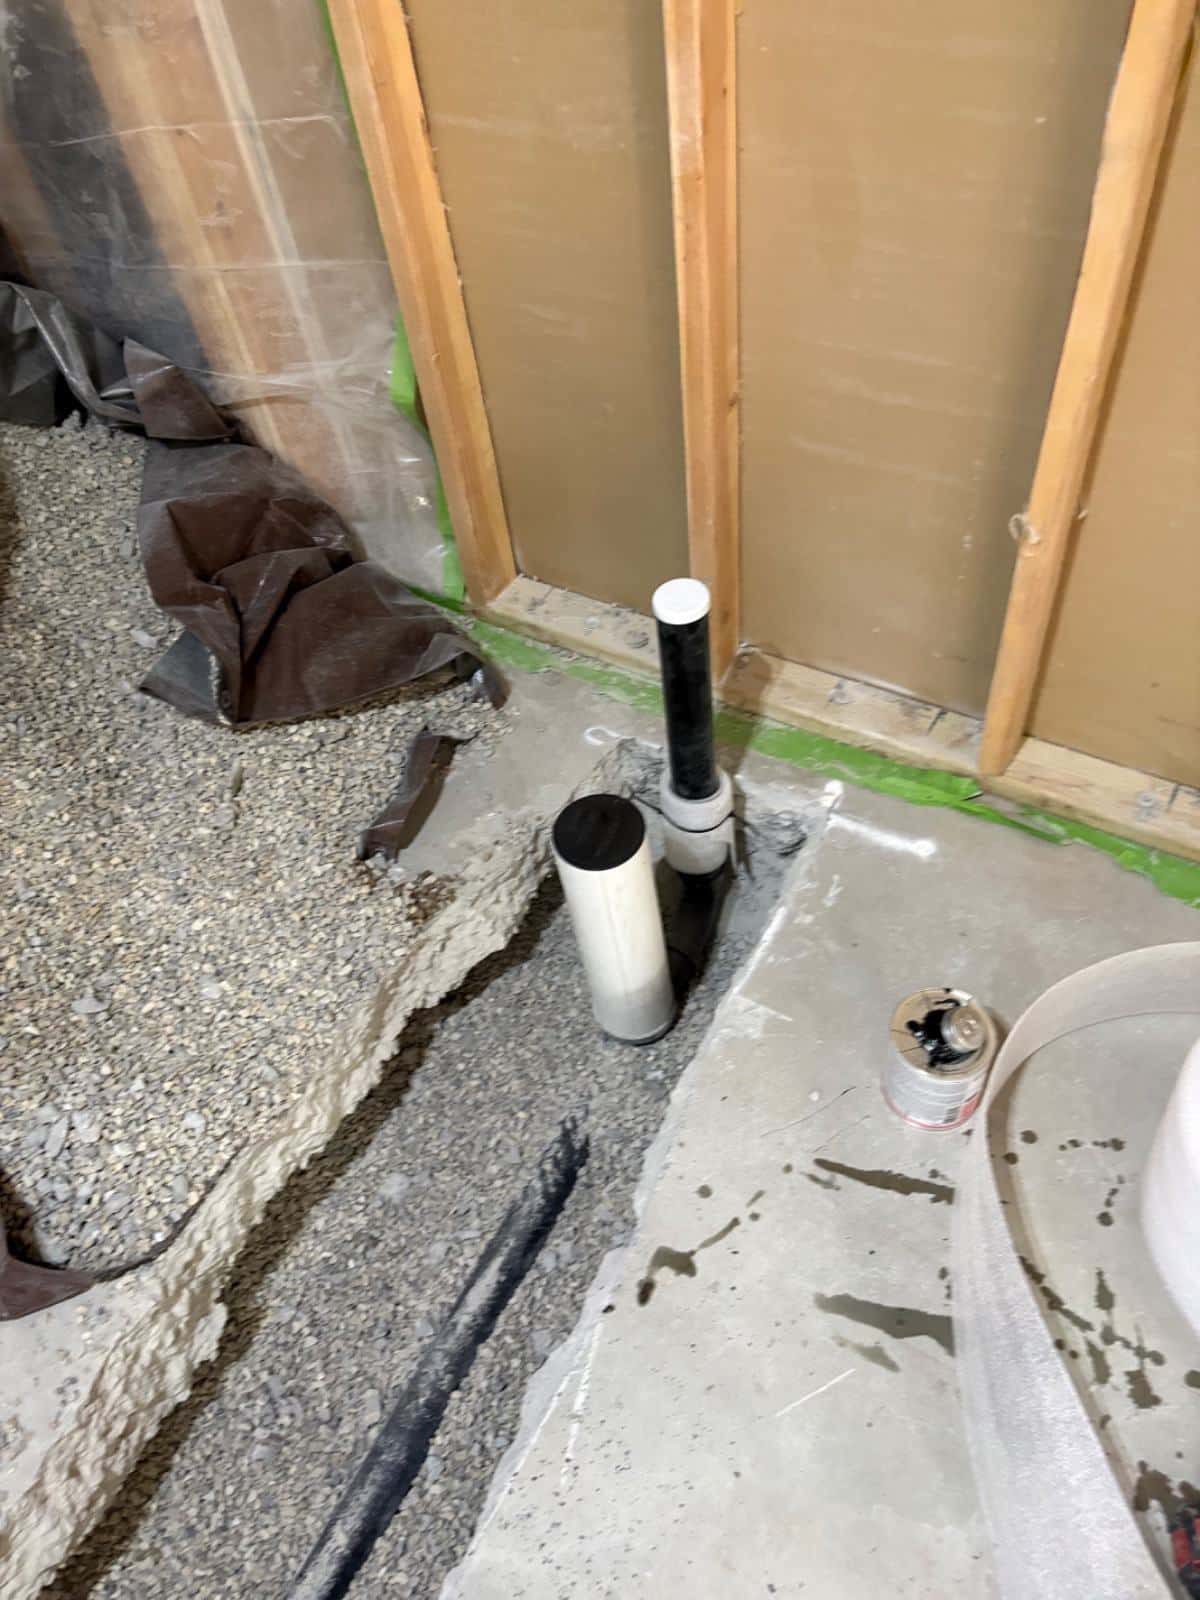

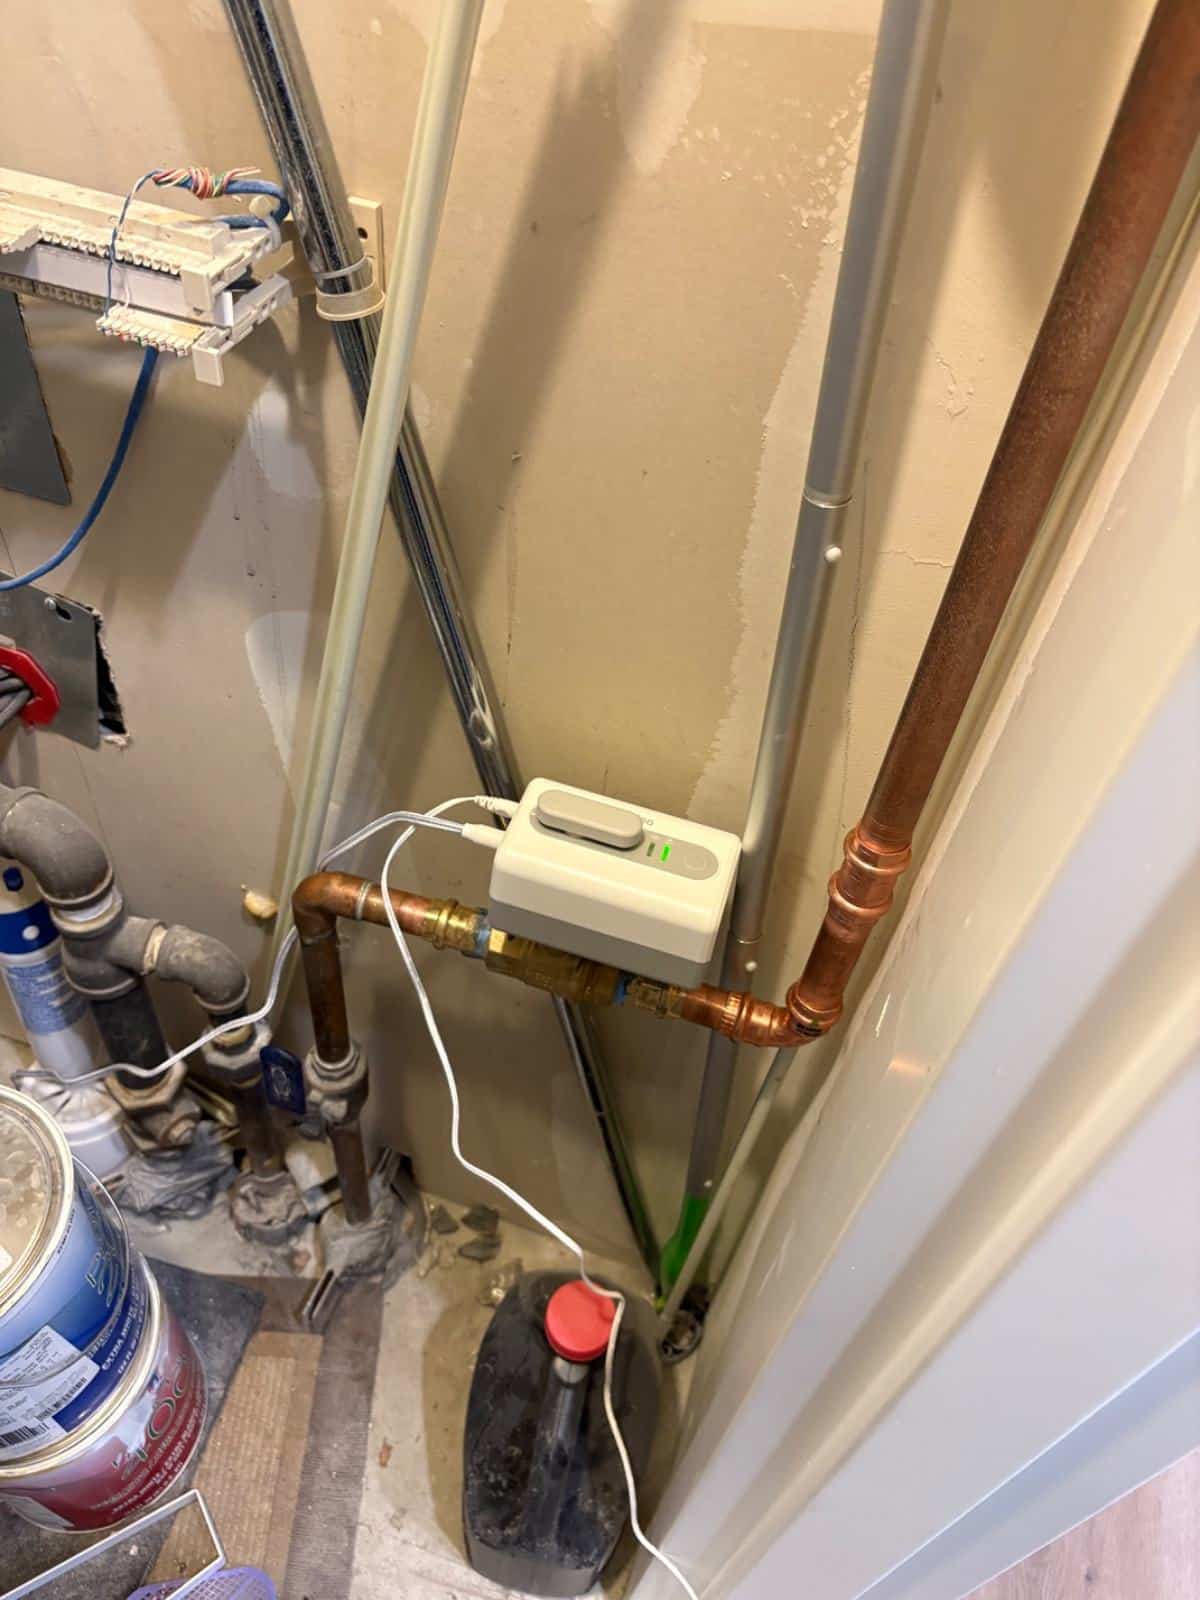


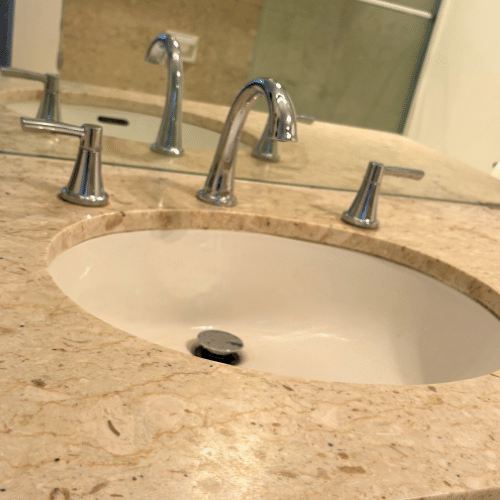
Explore the job records for photos and details of the plumbing work completed.
Plain answers
Before you open the house.
What is the difference between underground, rough-in and finish plumbing?
Underground work installs buried piping. Rough-in places the water pipes, drains, vents and concealed valves before walls and ceilings close. Finish plumbing connects the fixtures and trim after the relevant surfaces are ready. Underground work is also called sub-rough or underground rough-in.
Reference: Greater Salt Lake MSD · Springville
How do you decide which plumbing stages my remodel needs?
Start with the connections affected by the new layout. Work beneath the slab is underground plumbing, work inside open walls and floors is rough-in, and fitting and connecting the visible fixtures is finish plumbing. Reusable connections can reduce how much of each stage the room needs.
Reference: Salt Lake City · ICC
Can I choose the shower trim after rough-in?
Choose the shower valve and intended trim together before rough-in. The valve inside the wall accepts a specific range of handles and cover plates, and its depth must account for the finished tile surface.
Reference: Moen
How are plumbing visits scheduled around the other trades?
Underground work comes while the slab is open. Rough-in follows with wall and floor routes exposed. After testing, inspections and the room’s finish work, the fixtures can be fitted and connected. The shower system’s installation sequence also needs to fit the tile and waterproofing work.
Reference: Springville · KOHLER
Do plumbing remodels need a permit?
Moving or adding plumbing commonly requires a permit. Confirm the requirements with the building department for the project address before work begins. Include the permit contact and required inspections in the remodel schedule.
Reference: Salt Lake City
What needs checking on existing basement plumbing stubs?
Identify what each capped pipe serves, where it connects, its depth and condition, and its fit with the selected fixture. Check the drainage and vent arrangement before confirming which connections to reuse.
When does a basement bathroom need a sewage pump?
Gravity drainage needs a sewer connection low enough to receive the fixtures’ sloping drains. When the connection is too high, a suitable sewage-pump system lifts the wastewater to it. Plan the basin, vent, discharge route, power and service access together.
Reference: ICC · Liberty Pumps
What determines the work involved in moving a toilet?
The new location needs a water supply, a drain and suitable venting. The drain route must fit through the floor or slab and meet the existing line at the required elevation. Include the access needed to install it and the work to restore the opened surfaces.
Reference: ICC · Weyerhaeuser
Which existing pipes can stay during a remodel?
Assess their condition, capacity and fit with the new layout. Identify the lines to retain and those to replace in the estimate, with a process for documenting hidden conditions found during the work.
Reference: Salt Lake City
What should I have ready before talking to the plumber?
Bring the project address, photos of the room and accessible plumbing, a sketch of what moves, selected fixture models, and cabinet and finish details. List the selections and measurements still to be confirmed.
Reference: Salt Lake City · Moen
Which plumbing code applies in Utah?
Utah’s adopted editions and amendments, the project type and the permit timing matter. Murray’s July 1, 2026 notice lists the 2024 International Plumbing Code while the International Residential Code remains 2021. Confirm the applicable requirements with the building department for your address.
Reference: Murray City
Useful knowledge.
With a trail to follow.
Follow the references for fixture instructions, drainage and venting guidance, framing limits and local inspection information.
- Salt Lake City · permit questions ↗
Local permit guidance. Give the building department the project address and a description of the work.
Reference checked 2026-09-09 - Murray City · July 2026 code adoption ↗
The notice lists the 2024 IPC and explains that the residential code remains 2021. Application dates and Utah amendments matter.
Reference checked 2026-09-09 - Salt Lake City · remodel plan submittal ↗
Program requirements for existing and proposed plans, a written description of the work and project eligibility.
Reference checked 2026-09-09 - Springville · basement improvement inspections ↗
A Utah example of under-floor, rough and final inspection stages. The project city sets its inspection sequence.
Reference checked 2026-09-09 - ICC · sanitary drainage ↗
Drainage load, grade, cleanouts and lifting wastewater where gravity drainage is not possible. Use the adopted code and amendments.
Reference checked 2026-09-09 - ICC · why plumbing vents matter ↗
Air movement and pressure changes in drainage systems; vents protect the water seal in fixture traps.
Reference checked 2026-09-09 - ICC · water supply and distribution ↗
Water delivery, pressure, hot-water distribution and shutoff provisions.
Reference checked 2026-09-09 - Weyerhaeuser · common framing mistakes ↗
Engineered joist holes and damaged flanges require the manufacturer’s limits and appropriate review.
Reference checked 2026-09-09 - Liberty Pumps · pump and vent questions ↗
Differences between sewage, drain and sump pumps; below-sewer bathrooms and basin venting.
Reference checked 2026-09-09 - ICC · fuel-gas piping ↗
Gas distribution, shutoff valves and sediment traps. This is a technical reference; the adopted local rules and appliance instructions govern the job.
Reference checked 2026-09-09 - KOHLER · toilet installation guide ↗
An equipment-specific example of rough-in and finished-wall measurements; other toilets have different requirements.
Reference checked 2026-09-09 - Moen · concealed valve installation guide ↗
A manufacturer example of setting a concealed valve relative to the finished wall; use the exact selected valve’s instructions.
Reference checked 2026-09-09 - EPA WaterSense · product specifications ↗
WaterSense labels combine water-efficiency requirements with category-specific performance criteria.
Reference checked 2026-09-09 - Utah Legislature · statewide IPC amendments ↗
Utah-specific provisions, including water-heater seismic restraints and conditions for pan drainage. A pan and a floor drain are different receptors.
Reference checked 2026-09-09 - Charlotte Pipe · sanitary drainage specifications ↗
Fitting selection for changes in drainage direction, including long sweeps and branch connections.
Reference checked 2026-09-09 - RectorSeal · floor-drain trap protection ↗
Manufacturer explanation of a barrier device used to protect the water seal in an infrequently used floor drain.
Reference checked 2026-09-09 - ICC · fixture venting methods ↗
Individual vents, common vents and other approved arrangements; connections above fixture flood rims and vent sizing.
Reference checked 2026-09-09 - Greater Salt Lake MSD · remodeling permits and inspections ↗
Local distinctions between underground, rough plumbing, shower-pan and final inspections. The required inspections depend on the project.
Reference checked 2026-09-09 - KOHLER · shower base installation sequence ↗
An equipment-specific example: rough plumbing, setting and connecting the base, then wall construction. The selected system determines the actual sequence.
Reference checked 2026-09-09
Public records, reading formats and update history
Download the part explanations, planning checklist and answers below. The project section shows our published remodel work as new jobs are added.
Maintained by Mountain Man Plumbing. Plan plumbing changes in an existing Salt Lake Valley home. Explore the pipes beneath the slab, inside the walls and at the finished fixtures, then see how each stage fits into a remodel.
2026-09-09 · 1.2.1 — Edited stage chapters, room planning, part explanations and common questions for direct descriptions of the work, connection details and trade handoffs.
2026-09-09 · 1.2.0 — Reorganized the remodel hub around underground, rough-in and finish plumbing, with detailed stage chapters, readiness checks, room-specific stage explanations and connected 3D views.
2026-09-09 · 1.1.0 — Rebuilt connected underground drainage, floor drain and trap protection; corrected shower placement, supply proportions, vents and source-based component explanations.
2026-09-09 · 1.0.0 — Added the three-level house lesson, room planning chapters, preparation checklist, reference trail and public source record.
Bring us in while the options are open
Let’s plan the plumbing.
Show us the room and the changes you want. We can plan the pipes and connections with you and coordinate the work with the other trades.
The price, in plain terms
What does the
price cover?
- Name the work.What's being repaired or installed, and what stays.
- Check what's included.Parts, labor, access, cleanup and any required permit.
- Settle the open questions.Extra work, exclusions and the warranty for this job.
A quote for remodel plumbing should make the scope clear. Check who handles access and patching, whether any further diagnosis costs extra, and what happens if opening things up reveals more damage.
Found a lower number? Ask us why ours is different. Bring both descriptions of the work. Compare the equipment, repair scope and exclusions before deciding what the difference buys. A higher price alone doesn't prove a better job.
- What remodel plumbing costs in Utah What changes the cost and what to ask before agreeing. On Utah Plumbing Prices, which we publish.
- Already have a quote? Check it Use our second-opinion tool to work through the job and the price you've been given.
- How plumbing pricing works Flat rate, hourly, dispatch fees, permits: what each one means for what you pay.
From our local guides
Older homes. New plumbing projects.
Our county-record analysis shows when the neighborhoods were built. The repair guides explain the fixtures, pipes and remodel work.


